Taking Pictures of Flowers
==========================
###### [](https://upload.wikimedia.org/wikipedia/commons/5/51/Ilex_opaca%2C_Bird_Park%2C_2024-05-12%2C_03.jpg) [American Holly (*Ilex opaca*)](Aquifoliaceae/Ilex-opaca.html)
Old Pa Pitt is not as much of an artist with a camera as he would like to be. Nevertheless, he has many years’ experience taking pictures of flowers. Here are a few suggestions for newer photographers, beginning with
### Choosing the Right Camera.
_Start with the camera you have._ You don’t need a complicated camera to get good pictures. A better camera will help you in difficult situations, but those are probably only 2% of the shots you’re trying to get. A modern cell-phone camera will get you some very good flower pictures that you could publish in botanical magazines without raising any objections. The better the camera, the more choices you have, but the camera you have with you is better than the camera that’s sitting at home in a camera bag.
You will want a camera that can _focus close_. Most cell-phone cameras actually excel at focusing close, because they have tiny sensors and tiny lenses. Many fairly inexpensive cameras have good macro modes, and not a few can focus down to one centimeter.
You also need a little bit of _control over the exposure_, as we’ll discuss in a moment. Even most cheap cameras have a program mode where you can adjust the exposure two stops either direction from normal, and that’s enough in most cases. The more manual control the better, but again, it will be only 2% of the time that you need it.
If you want a better camera but don’t want to spend a lot of money, _buy a used one_. It doesn’t have to be very recent. A camera with 4-megapixel resolution will take pictures good enough for a whole page in a magazine. Old Pa Pitt’s favorite camera for botanical photography cost him 99¢ plus $6 for shipping.
######  The 99¢ camera, with 4-megapixel resolution; it can focus on things that almost touch the lens.
Of course, if you have an expensive camera, use it to its full ability. One thing a good SLR with a large sensor will give you is more control over the _depth of field_. You can use that to remove distractions by opening the aperture wide to blur the background while keeping the floral subject in sharp focus, or—on the other hand—to get sharp renditions of both leaves and flowers by narrowing the aperture.
Remember, however, that when you are focusing very close, the depth of field may be very shallow even with a small sensor. In some cases, the larger sensor of a better camera can be a disadvantage.
[](https://upload.wikimedia.org/wikipedia/commons/0/0f/Trifolium_repens%2C_Beechview%2C_2024-05-13-1.jpg)
This picture of [White Clover (*Trifolium repens*)](https://reference.florapittsburghensis.com/Leguminosae/Trifolium/Trifolium-repens.html) was taken with a Kodak EasyShare Z981, a superzoom camera with a small sensor and very close macro focusing. The lens was set to its widest aperture (at this focal length, f/3.5), which blurred the background very effectively; we would not want any *less* depth of field than this.
And now, some
### Rules for Effective Botanical Photography.
Rule 1: _Underexpose_. This is directly opposite to the advice usually given to photographers of other subjects, who are told to use the brightest exposure that will not blast out important details. But that’s the point here. Most of the time, the flower is the brightest part of the plant, and it will usually be the brightest thing in the picture you’re taking. (This is evolution at work: the flower’s job, after all, is to attract the attention of pollinators.) An exposure that your camera thinks is correct for the scene as a whole will lose the details in the flower. Since the flower is the focus of attention, you want to expose for the flower, not for the whole scene. Old Pa Pitt sets his camera to 2/3 of a stop below normal as his basic exposure for flowers, and adjusts from there. It is possible to brighten the picture a little in software without adding too much noise, but it is not possible to retrieve detail that has been blasted out into white.
[](https://florapittsburghensis.com/wp-content/uploads/2024/05/Veronica-officinalis-Verona-2024-05-10-01.jpg)
In this picture of Common Speedwell (*Veronica officinalis*), the exposure was decreased by 0.7 EV (“EV” stands for “[exposure value](https://en.wikipedia.org/wiki/Exposure_value)”), which preserves the details in the flowers. Find the +/- setting on your camera. It may not be available in “easy” mode. In cell-phone cameras, the exposure can often be adjusted by holding down on the focus point and swiping to the left.
Rule 2: _Take lots of pictures._ Storage is cheap. A 14-megapixel camera may be able to fit about a thousand pictures on a 4-gigabyte card, which is a tiny card by today’s standards. There is no reason not to take thirty pictures of each flower that interests you. Take them from slightly different angles and slightly different distances. If you’re using autofocus, your camera may not always focus on the right thing. If you’re focusing manually, you may not always get it right. Some pictures may come out too dark, others too light. But it’s likely that at least one picture out of thirty will be acceptable. Father Pitt often uses a camera that can be set to bracket exposures, taking three shots in a row with different exposure settings, and he makes full use of that feature. He also often uses two cameras, so that what one misses the other still has a chance to get.
Rule 3: _Take pictures on cloudy days or in the shade_. Soft, even lighting is much better, or at least easier, for capturing the details of plants. Of course, you don’t always have this choice, so…
Rule 4: _If it’s sunny, don’t have the sun behind you._ This is another rule that seems counterintuitive, but if your subject is directly illuminated by the sun, you’ll lose most of the detail. Instead, take the picture with the sun at least 90° to the left or right, so that details are picked out by shading. You can often get a striking flower picture with the sun almost behind the subject, shining through the petals and illuminating fine details that would be completely invisible if the sun were shining directly on them.
[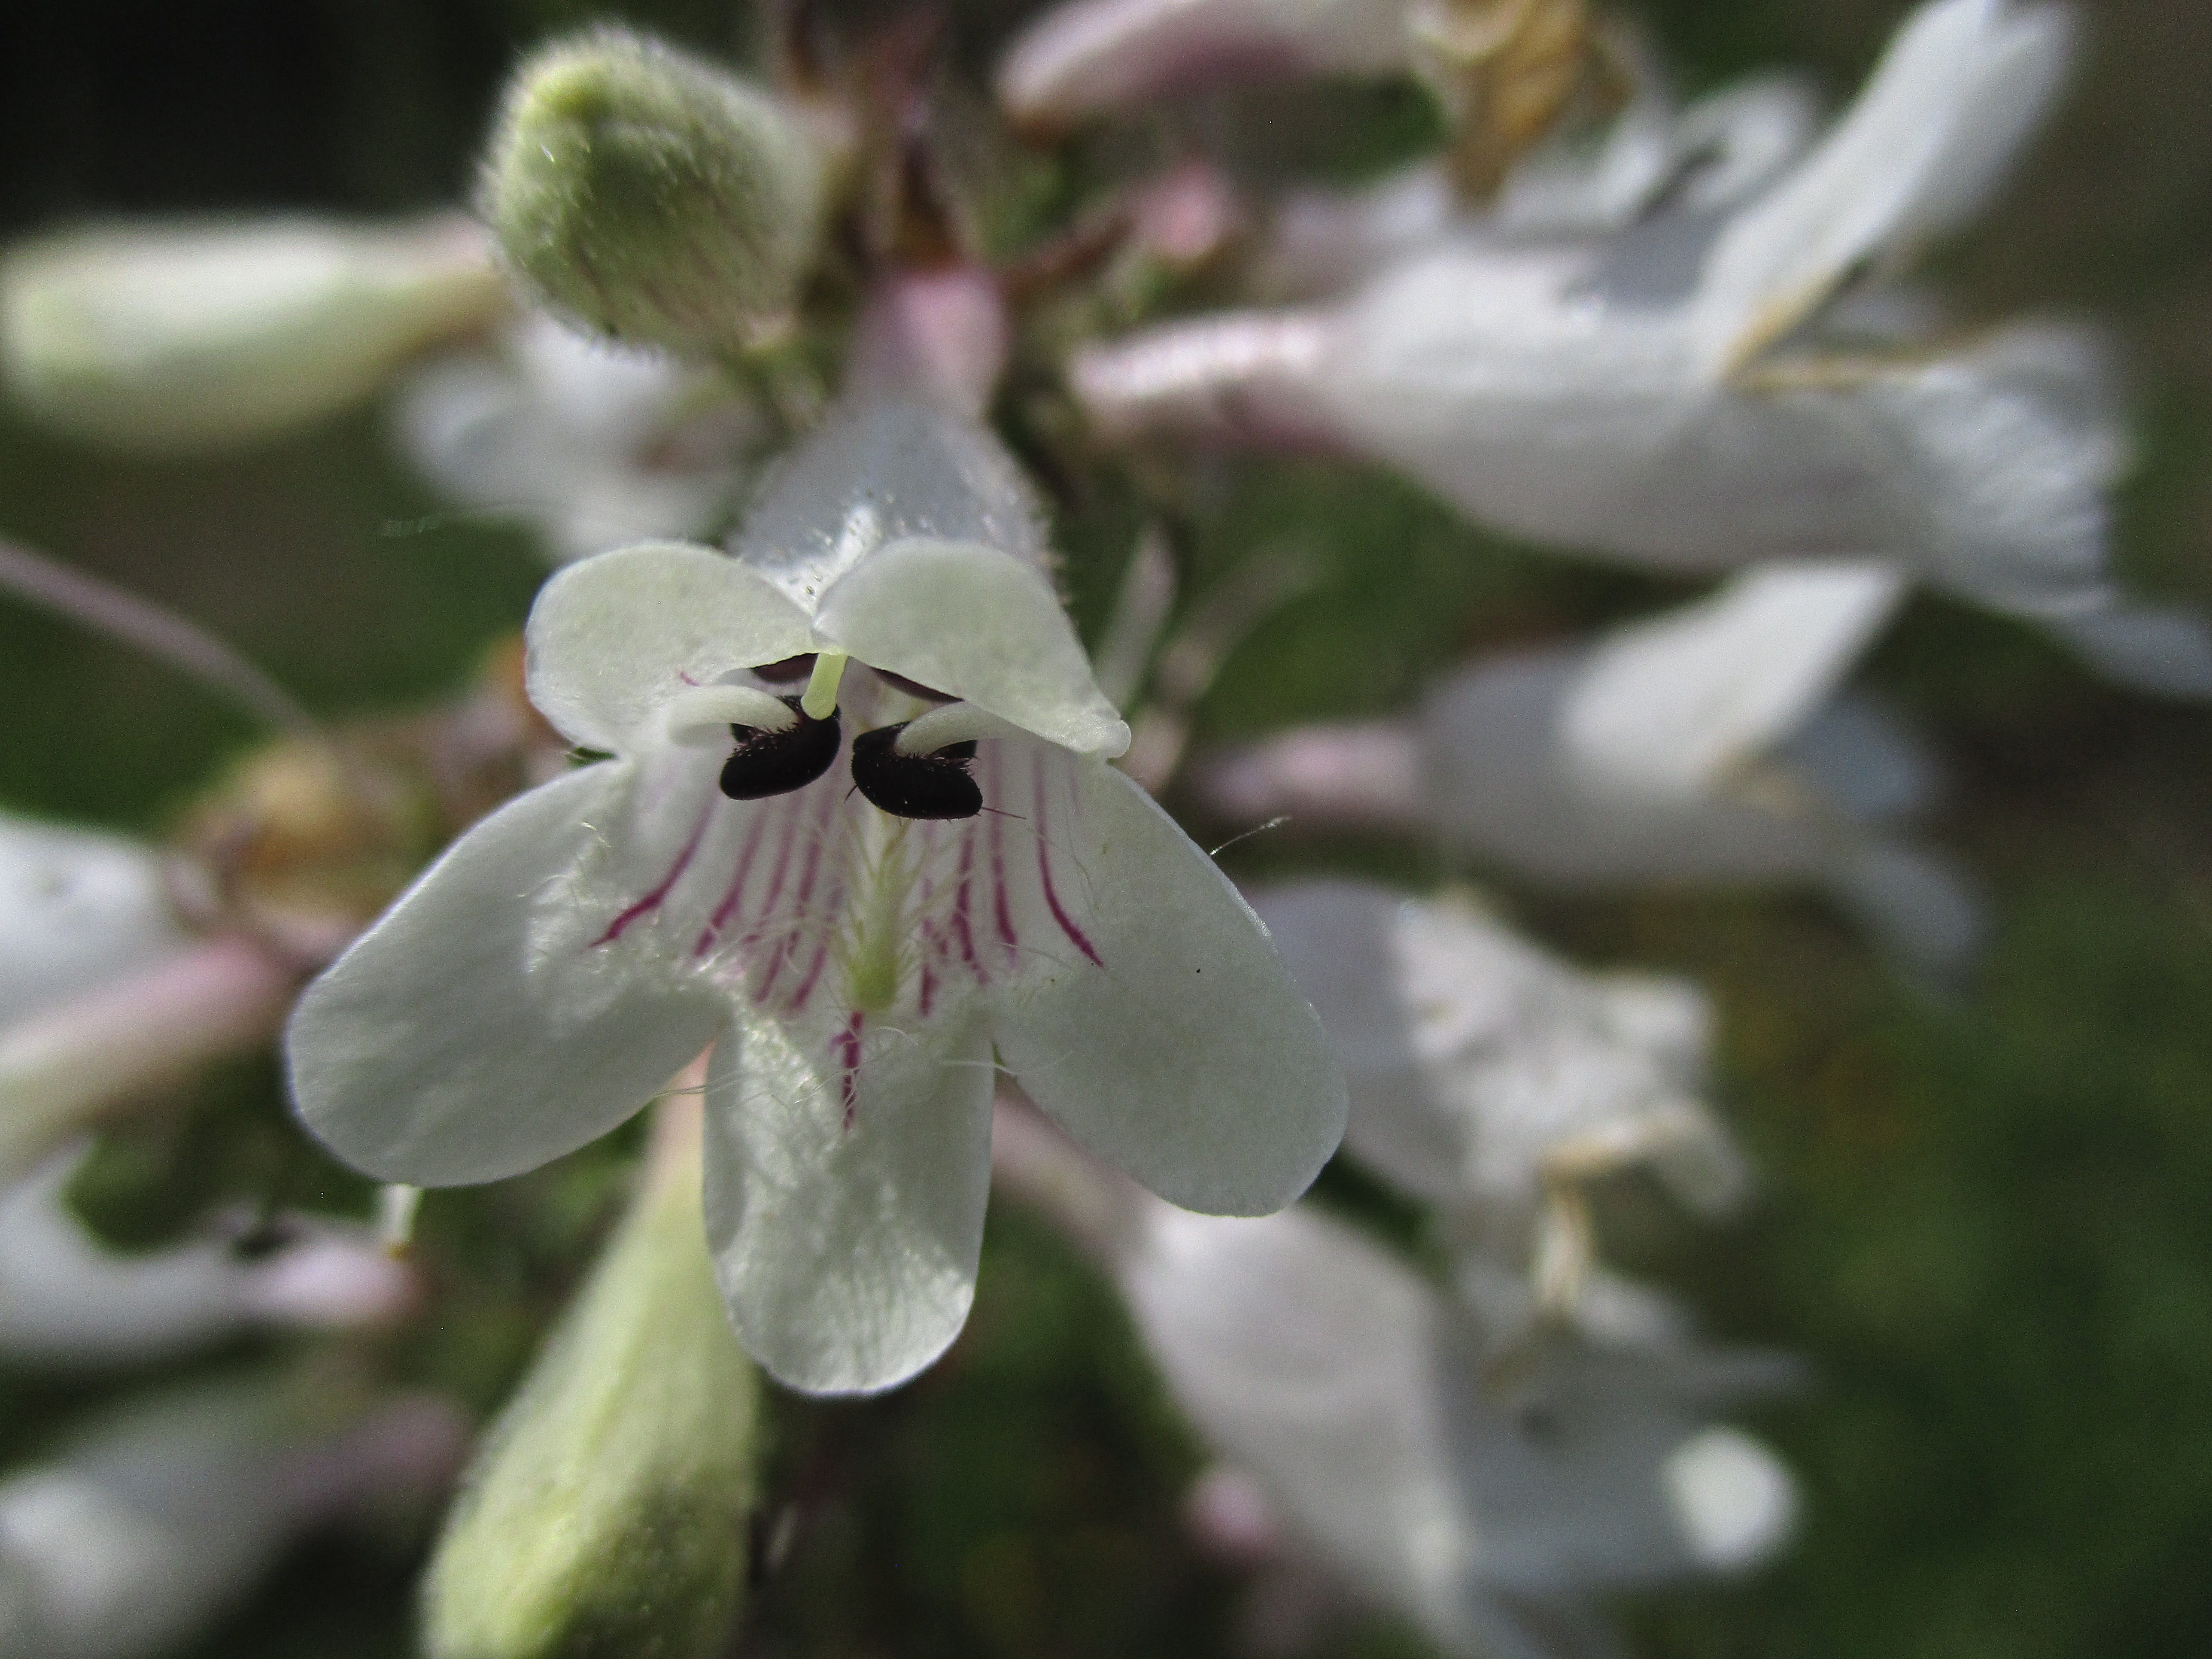](https://upload.wikimedia.org/wikipedia/commons/6/6c/Penstemon_digitalis%2C_2023-06-10%2C_South_Side%2C_01.jpg)
In this picture of [Foxglove Beardtongue (*Penstemon digitalis*)](https://reference.florapittsburghensis.com/Scrophulariaceae/Penstemon/Penstemon-digitalis.html), the sun is coming from the left and somewhat behind the flowers.
Rule 5: _Pay attention to the background_. You want no distractions in the background. Try to compose a shot that will focus attention on the thing you want people to see—in this case, the flower. Bright objects in the background—pieces of trash, patches of sunlight, and so on—will grab attention for themselves.
These rules are all meant to help you develop a better eye for botanical pictures. They are rules of thumb, not laws. If you break them all and get a better picture, you have done a good thing. But Father Pitt has found them helpful in raising the percentage of good pictures he gets from the hundreds he takes on each of his botanizing expeditions.